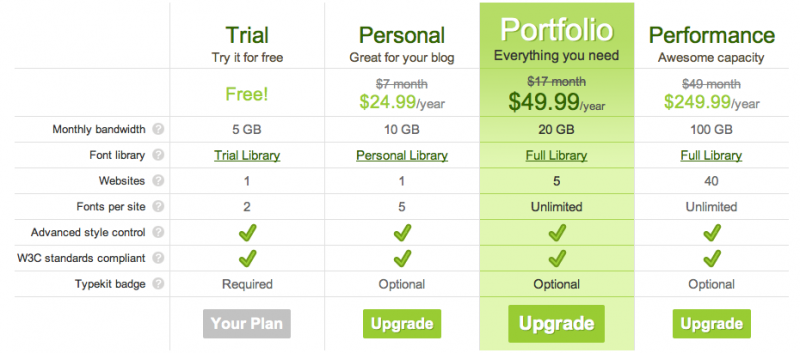
The interface of Typekit is very user friendly. Minimal buttons, so making choices is effortless. The process is simple too. From a large list of fonts, the free accounts are permitted to use 2, while paid accounts can have access to 5, and even the whole library. Each plan also has increasing bandwidth, and website usage. See the comparison chart below:

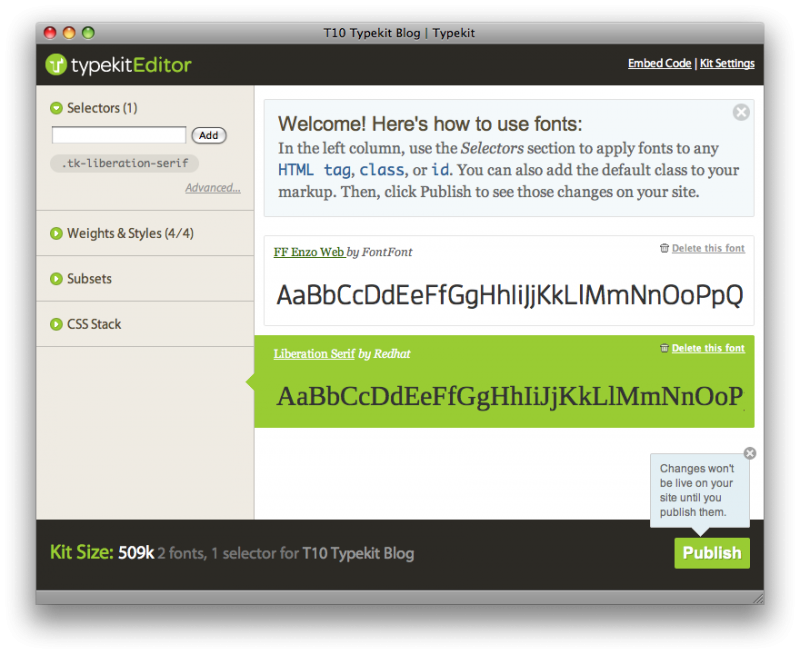
The editor itself is shown in the image below. From here, you can see what fonts are currently installed for use on your site. When highlighted, the column on the left shows various options, such as the selectors to specify them in your style-sheet, as well as weights, subsets, and stacks. Weights and styles can range anywhere from 2 to 10. Subsets are not yet a part of the trial user account plan, so I cannot comment on that section. The CSS Stacks define the @font-face element in a style-sheet.
 The two links at the top right include instructions for setting up Typekit on your server. In order to enable Typekit, and have your site recognize the fonts, two lines of code need to be added to the <head> section of your website. Clicking on Embed Code yields this result:
<script type=”text/javascript” src=”http://use.typekit.com/vsz6mgu.js”></script>
<script type=”text/javascript”>try{Typekit.load();}catch(e){}</script>
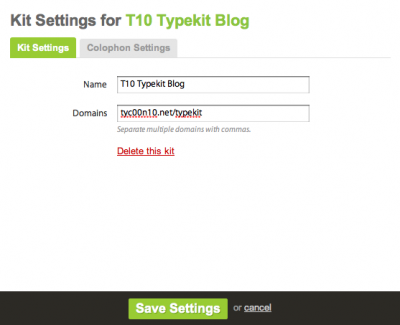
Clicking on Kit Settings is how you direct the Typekit servers to your website. The screenshot below shows how this site is set up. A simple title and domain where it is hosted is all you need. The tab Colophon Settings is the tiny gray badge you see at the bottom right of this page. It simply links to a page where it shows what fonts are currently active on the website. Be sure to point it to the right place.

Once you’ve done all of those steps, you’ll have Typekit up and running in no time at all! If you’re running Wordpress like this site, you may want to look into the nifty plugin that will save a bit of time as well.